
Introduction of CSS
Cascading Style Sheets, also referred as CSS, is a stylesheet language that simplifies the process of making web pages presentable. It is a simple mechanism that lets you apply styles such as fonts, colours, spacing, etc., to web documents. Above all, this cornerstone technology enables you to do this independent of the HTML that makes up each web page. This easy-to-learn and understand language offers robust control over the presentation and styling of an HTML document.
WHY CSS?
- Saves time: It simplifies page making and minimises the time spent as you can use one CSS file on multiple HTML pages.
- Easy Maintenance: Since all codes are placed in one single file, any change made in style is automatically updated in all elements across web pages, making it very easy to maintain.
- Search Engines: CSS has a simpler structure and less coding, so search engines can easily "read" its content and index webpages faster.
- Superior styles to HTML: With a more comprehensive array of attributes than HTML, CSS gives a better look to your HTML page than HTML attributes.
- Offline Browsing: With the assistance of an offline cache, CSS can store web applications locally. This lets you view offline websites.
CSS Syntax:
CSS is a rule-based coding language used to specify website formats. A style rule set has two parts- a selector and a declaration block.
Syntax :
Selector -- h1
Declaration -- {color:blue;font size:12px;}
- The selector is used to select the HTML element you want to style. It can choose one or more elements simultaneously.
- The declarations determine how the elements are formatted on a webpage. The declaration block includes one or more declarations separated by semicolons.
- Every declaration has two parts: a CSS property name and a value separated by a colon. For example, –; colour is property, and blue is value. and –; font-size is property and 12px is value.
- Declaration always ends with a semicolon, and curly braces surround declaration blocks.
Example :
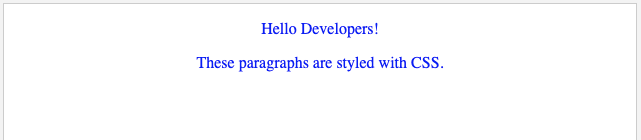
In the following example all p elements will be center-aligned, with a blue text color :
p {
	color: blue;
	text-align: center;
}Output :
CSS Selectors
CSS selectors define the HTML elements to which CSS rules apply. It finds the HTML elements on the basis of their element name, id, class, attribute, and more.
1. THE UNIVERSAL SELECTORS: Instead of selecting elements of a specific type, the universal selector simply matches any element type's name.
Example :
* {
	color: red;
	text-align: center;
}Output :
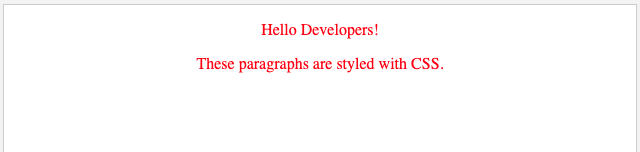
2. THE ELEMENT SELECTOR: It is used for selecting elements on the basis of the element name. For selecting all p elements on a page (in the example below, all p elements will be centre-aligned, with a red text colour):
Example :
p {
	text-align: center;
	color: red;
}
3. THE DESCENDANT SELECTOR: The descendant selector is used for matching all elements that are descendants of a particular element. On selecting a descendant selector, the style rule will apply to a specific element only when it lies inside a particular element. For example, the style rule will apply to the em element only when it lies inside the ul tag in the below-mentioned example.
Example :
<!DOCTYPE html>
<html>
<head>
<style>
ul em {
color: red;
}
</style>
</head>
<body>

<ul>
  <li><em>Coffee</em></li>
  <li>Tea</li>
  <li>Milk</li>
</ul>

</body>
</html>
4. THE ID SELECTOR :
- It matches an element on the basis of the value of the element's id attribute.
- Every element id is unique within a page; hence the id selector is used for selecting one unique element!
- An id name cannot start with a number.
- For choosing an element with a specific id, write a hash (#) character, followed by the element's id.
- In the example below, the CSS style rule will be applied to the HTML element with id=" para1″
5. THE CLASS SELECTORS :
- It chooses HTML elements having a specific class attribute.
- For selecting elements with a particular class, write a period (.) character, followed by the name of the class.
- In the following example, all HTML elements with class= "center" will be red and center-aligned:
You can apply more than one class selector to a given element. Consider the following example:
<p class="center large">This paragraph refers to two classes.</p>
6. GROUPING SELECTORS
The CSS grouping selector chooses all the HTML elements with the same style definitions, like this:
h1 {
	text-align: center;
	color: blue;
}

h2 {
	text-align: center;
	color: blue;
}

p {
	text-align: center;
	color: blue;
}
For minimising the code, it's better to group the selectors. You can separate each selector with a comma to group selectors. In the following example, we have grouped the selectors from the code above::
h1, h2, p {
	text-align: center;
	color: red;
}
Before CSS:
<!DOCTYPE html>
<html>
<head>
	<title>Example</title>
</head>
<body>
	<main>
	<h1>HTML Page</h1>
         <p>This is a basic web page.</p>
	</main>
</body>
</html>
After CSS
In this example, we add some CSS.
<!DOCTYPE html>
<html>
<head>
	<title>Example</title>
	<style>
	main {
		width: 200px;
		height: 200px;
		padding: 10px;
		background: beige;
	}
	h1 {
		font-family: fantasy, cursive, serif;
		color: olivedrab;
		border-bottom: 1px dotted darkgreen;
	}
	p {
		font-family: sans-serif;
		color: orange;
	}
	</style>
</head>
<body>
	<main>
	<h1>HTML Page</h1>

       <p>This is a basic web page.</p>

	</main>
</body>
</html>
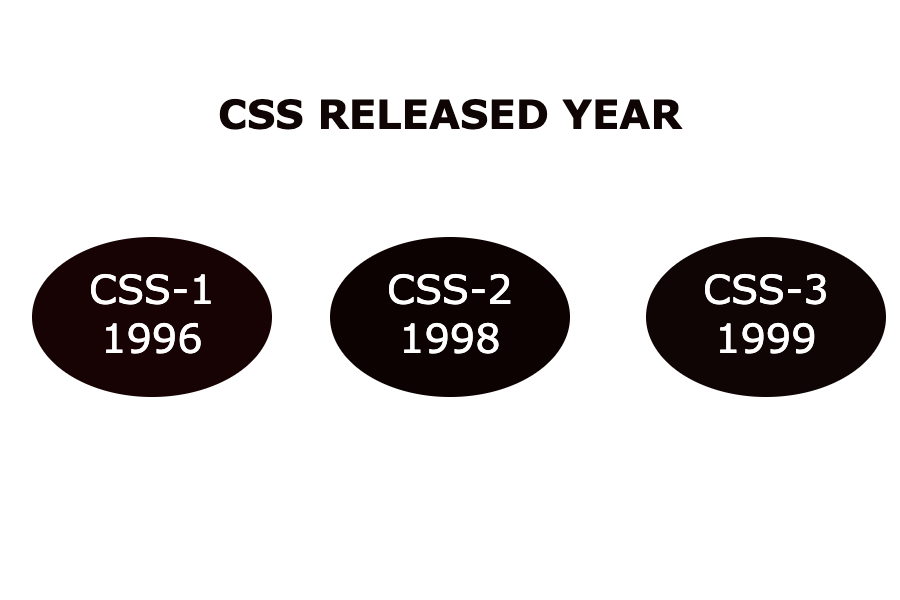
CSS Versions
- CSS1
- CSS2
- CSS3
- CSS4
Version 4 comes with:-
- CSS-Pro
- CSS-Mobile
Supported Browser:
- Google Chrome
- Microsoft Edge
- Firefox
- Opera Safari
CSS Full Form
CSS is the abbreviation of Cascading Style Sheet. This style sheet language consists of rules that shape the HTML elements that will be displayed in the browsers as a webpage. The website created only using HTML and without using the CSS looks dull. This is because CSS gives the outer cover to any HTML elements. CSS's Internet media type (MIME type) is text/CSS. World Wide Web Consortium (W3C) developed Cascading Style Sheet in 1996. There are multiple ways in which CSS can be applied to HTML.
- The inline CSS style that will look like below code:
<h1 style="color: green;">Welcome to CSS tutorial</h1>
- The internal CSS style that will look like below code:
<!DOCTYPE html>
<html>
  <head>
    <title> internal CSS </title>
    <style>
     h1 {
        color: green;
     }
    </style>
  </head>
  <body>
    <h1>Welcome to CSS tutorial</h1>
  </body>
</html>
- The external CSS style that will look like below code:
/* this will be separate file */
<style>
h1 {
   color: green;
}
</style>- CSS version release year:
Characteristics of CSS:
- Maintenance: CSS simplifies maintaining a website because all codes are placed in one single file. Any change made in style is automatically updated in all elements across web pages, making it very easy to maintain.
- Time-saving: It simplifies page making and minimises the time spent as a single script can be used on multiple HTML pages.
- Support: All browsers and search engines support CSS.
- Cache storing: With the help of an offline cache, a CSS can store web applications locally. This lets you view websites when offline.
- Native front-end: CSS includes a vast list of attributes and functions helpful in designing the HTML page.
- Selectors: CSS includes many selectors, such as ID selectors, Class Selectors, etc., that help perform specific tasks.
Advantages of CSS:
- Website maintenance is much easy, simple, and fast with CSS.
- CSS helps in making spontaneous and consistent changes.
- CSS improves the page loading speed of a website and makes the search engine capabilities better crawl the web pages.
- CSS allows you to define the position of HTML elements and gives the developer the ability to re-position HTML elements to align with the page's aesthetic appeal.
Disadvantages of CSS:
- Cross-browser issues occur in CSS. The CSS works differently on different browsers, so any change may look perfect on chrome but different on other browsers. It requires you to add the script for that browser also.
- CSS doesn't have built-in security. Therefore, there is a lack of security.
- The open text-based system of CSS makes it more vulnerable to attacks.
- There are fragmentation issues in CSS.
What are the ways to include a CSS file? Why use @import?
There are several ways to include a CSS property in the HTML page. The information in the style sheet is used to format HTML documents.
The multiple ways to include CSS files are listed below:
External style sheet (Using HTML <link> Tag): External CSS style sheet defines the style for different HTML pages. It contains a separate CSS file with only style property with the assistance of tag attributes (For example, class, id, heading, … etc.). A separate file with a .css extension is used to write a CSS property, and it must be linked to the HTML document using the link tag. Style can be set only once for each element and is applied across web pages. The external style sheet can be linked with the HTML webpage using a link tag.
Example:
<link rel="stylesheet" href="style.css">External style sheet (Using the @import At-Rule): You must include the at-rule method either within the <style> tag or inside the style sheet.
<style>
@import url(style.css);
</style>
Internal style sheet (Using the <style> Element): Internal style sheets are used when you must uniquely style a single HTML document. The head section within the HTML file should have the CSS rule set, i.e., the CSS is embedded within the HTML file.
<style>
element {
    // CSS property
}
</style>
Inline Style: Inline CSS means the CSS property is added in the body section attached with an element. This style is specified within an HTML tag using the style attribute. It enables the application of a unique style for a single element.
<h1 style="style property">Welcome to CSS tutorial</h1>Best Approach: External Style Sheet (using HTML <link> Tag) is an excellent way to link the element. It is very easy and efficient to maintain and re-use the CSS file across different pages. The placement of the <link> tag is done in the HTML <head> element. For specifying a media type=" text/css" for a CSS <type> attribute, for ignoring style sheet types that are not supported in a browser.
Example 1: The file given below contains CSS property. This file save with .css extension. For Ex: style.css
body {
    background-color:powderblue;
}
.main {
    text-align:center;
}
.GFG {
    color:#009900;
    font-size:50px;
    font-weight:bold;
}
#style {
    font-style:bold;
    font-size:20px;
}
<!DOCTYPE html>
<html>
<head>
<link rel="stylesheet" href="style.css"/>
</head>
<body>
<div class = "main">
<div class ="GFG">Welcome to CSS tutorial</div>
<div id ="style">A computer science portal for CSS</p>
</div>
</body>
</html>
Example 2: This example describes the Internal or Embedded CSS.
<!DOCTYPE html>
<html>
	<head>
		<title>Internal CSS</title>
		<style>
			.main {
				text-align:center;
			}
			.GFG {
				color:#009900;
				font-size:50px;
				font-weight:bold;
			}
			.style {
				font-style:bold;
				font-size:20px;
			}
		</style>
	</head>
	<body>
		<div class = "main">
		<div class ="GFG">Welcome to CSS tutorial</div>
		<div class ="style">A computer science portal for CSS</p>

		</div>
	</body>
</html>
Example 3: This example describes the inline CSS.
<!DOCTYPE html>
<html>
	<head>
		<title>Inline CSS</title>
	</head>

	<body>
		<p style = "color:#009900;
					font-size:50px;
					font-style:italic;
					text-align:center;">
		Welcome to CSS</p>

	</body>
</html>
@import rule: For importing one style sheet into another one, the @import rule is used. As this rule supports media queries, the user can also import the media-dependent style sheet. You must declare the @import rule at the top of the document after any @charset declaration.
Characteristics of @import:
- It is used for importing a style sheet into an HTML page or another style sheet.
- It is also used to add media queries. Therefore import is media-dependent.
- The @import rule should be declared at the top of the document.
Syntax :
@import url|string list-of-mediaqueries;
Property values:
- url|string: The location of the resource to be imported is represented by a URL or a string. The url may be relative or absolute.
- List-of-media queries: The list of media queries conditions the application of the CSS rules defined in the linked URL.
Example 1: Consider the two CSS files as shown below.
- icss.css
@import url("i1css.css");
h1 {
    color: #00ff00;
}- i1css.css
h1 {
   text-decoration: underline;
   font-size:60px;
}

p {
   padding-left: 20px;
   font-size: 60px;
}
<!DOCTYPE html>
<html>
<head>
	<title>WebPage</title>
	<link href="icss.css" rel="stylesheet">
</head>

<body>
	<h1>CSS Tutorial</h1>

<p>A computer science portal for CSS</p>

</body>
</html>
Example 2:
<!DOCTYPE html>
<html>

<head>
	<title>@import property</title>

	<style type="text/css">
		@import url(
"https://your-url.com/imp.css");
	</style>
</head>

<body>
	<div id = "CSS">

		<h1>Welcome to CSS</h1>

		<h2>External style sheet (Using @import At-rule)</h2>
	</div>
</body>

</html>
Supported Browser:
- Google Chrome 1.0
- Internet Explorer 5.5
- Firefox 1.0
- Opera 3.5
- Safari 1.0