• Home
  • HTML
    • HTML Introduction
    • HTML Basic
    • HTML Elements
    • HTML Attributes
    • HTML Headings
    • HTML Paragraphs
    • HTML Text Formatting
    • HTML Styles
    • HTML Comments
    • HTML Styles - CSS
    • HTML Links
    • HTML Images
    • HTML Tables
    • HTML Lists
    • HTML Block and Inline Elements
    • HTML class Attribute
    • HTML Forms
    • HTML Media
  • CSS
    • Introduction of CSS
    • CSS Syntax
    • CSS Selectors
    • How To Add CSS
    • CSS Comments
    • CSS Colors
    • CSS Backgrounds
    • CSS Borders
    • CSS Margins
    • CSS Text
    • CSS Lists
    • CSS Tables
    • CSS Box Model
    • CSS Dimension
    • CSS Padding
    • CSS Border
    • CSS Margin
    • CSS Outline
    • CSS Cursors
    • CSS Overflow
    • CSS Units
    • CSS Visual Formatting
    • CSS Display
    • CSS Visibility
    • CSS Position
    • CSS Layers
    • CSS Float
    • CSS Alignment
    • CSS Pseudo-classes
    • CSS Pseudo-elements
    • CSS Media Types
    • CSS Sprites
    • CSS Opacity
    • CSS Attribute Selectors
    • CSS Validation
    • CSS3 Border
    • CSS3 Gradients
    • CSS3 Text Overflow
  • JavaScript
    • JS Introduction
    • JS Getting Started
    • JS Syntax
    • JS Variables
    • JS Generating Output
    • JS Data Types
    • JS Operators
    • JS Events
    • JS Strings
    • JS Numbers
    • JS If Else
    • JS Switch Case
    • JS Arrays
    • JS Sorting Arrays
    • JS Loops
    • JS Functions
    • JS Objects
    • JS DOM Nodes
    • JS DOM Selectors
    • JS DOM Styling
    • JS DOM Get Set Attributes
    • JS DOM Manipulation
    • JS DOM Navigation
    • JS Window
    • JS Screen
    • JS Location
    • JS History
    • JS Navigator
    • JS Dialog Boxes
    • JS Timers
    • JS Date and Time
    • JS Math Operations
    • JS Type Conversions
    • JS Event Listeners
    • JS Event Propagation
    • JS Borrowing Methods
    • JS Hoisting Behavior
    • JS Closures
    • JS Strict Mode
    • JS JSON Parsing
    • JS Error Handling
    • JS Regular Expressions
    • JS Form Validation
    • JS Cookies
    • JS AJAX Requests
    • JS ES6 Features
  • jQuery
    • jQuery Introduction
    • jQuery Syntax
    • jQuery Selectors
    • jQuery Events
    • jQuery Show/Hide
    • jQuery Fade
    • jQuery Slide
    • jQuery Animation
    • jQuery Stop
    • jQuery Chaining
    • jQuery Callback
    • jQuery Get/Set
    • jQuery Insert
    • jQuery Remove
    • jQuery CSS Classes
    • jQuery Style Properties
    • jQuery Dimensions
    • jQuery Traversing
    • jQuery Ancestors
    • jQuery Descendants
    • jQuery Siblings
    • jQuery Filtering
    • jQuery Ajax
    • jQuery Load
    • jQuery Get/Post
    • jQuery No-Conflict
  • PHP
    • PHP Introduction
    • PHP Install
    • PHP Syntax
    • PHP Comments
    • PHP Variables
    • PHP Echo / Print
    • PHP Data Types
    • PHP Strings
    • PHP Constants
    • PHP Operators
    • PHP If...Else...Elseif
    • PHP Switch
    • PHP Loops
    • PHP Functions
    • PHP Arrays
    • PHP Superglobals
    • PHP Date and Time
    • PHP Include
    • PHP File Handling
    • PHP File Upload
    • PHP Cookies
    • PHP Sessions
    • PHP Filters
    • PHP Callback Functions
    • PHP JSON
    • PHP Exceptions
    • PHP What is OOP
    • PHP Classes/Objects
    • PHP Constructor
    • PHP Destructor
    • PHP Access Modifiers
    • PHP Inheritance
    • PHP Abstract Classes
    • PHP Interfaces
    • PHP Traits
    • PHP Static Methods
    • PHP Namespaces
  • SQL
    • Introduction to SQL
    • SQL Create Command
    • SQL ALTER Command
    • SQL Truncate Drop Rename
    • INSERT SQL command
    • UPDATE SQL command
    • DELETE SQL command
    • SQL COMMIT command
    • SQL ROLLBACK command
    • SQL GRANT and REVOKE Command
    • SQL WHERE clause
    • SQL LIKE clause
    • SQL ORDER BY Clause
    • SQL Group By Clause
    • SQL HAVING Clause
    • SQL DISTINCT keyword
    • SQL AND OR operator
    • SQL Constraints
    • SQL Functions
    • SQL JOIN
  • Python
    • Getting started with Python
    • Introduction to IDLE
    • Python 2.x vs. Python 3.x
    • Syntax Rules and First Program
    • Numbers and Math Functions
    • Python Operators
    • Python Variables
    • Python Modules and Functions
    • Python Input and Output
    • Data Types in Python
    • String in Python
    • String Functions in python
    • Lists in Python
    • Utilizing List Elements by Iterating
    • Deleting List Elements & other Functions
    • Dictionaries in Python
    • Functions for Dictionary
    • Tuples in Python
    • Relational and Logical Operators
    • Conditional Statements in Python
    • Looping in Python
    • Define Functions in Python
    • Python-Introduction to OOP
    • Object Oriented Programming in Python
    • Classes in Python
    • The concept of Constructor
    • Destructors - Destroying the Object in Python
    • Inheritance in Python
    • Access Modifers in Python
    • Types of Inheritance
    • Method Overriding in Python
    • Polymorphism
    • static Keyword
    • Operator Overloading Python
    • Introduction to Error Handling
    • Exception Handling: try and except
    • Exeption Handling: finally
    • Exception Handling: raise
    • File Handling
    • Reading and Writing File
    • Introduction to Multithreading
    • Threading Module in Python
    • Thread Object
    • Lock Object
    • RLock Object
    • Event Object
    • Timer Object
    • Condition Object
    • Barrier Object
    • __name__ Variable in Python
    • Iterable and Iterator
    • yield Keyword
    • Python Generators
    • Python Closures
    • Python Decorators
    • @property Decorator in Python
    • Assert Statement
    • Garbage Collection
    • Shallow and Deep Copy
    • Introduction to Logging
    • Configure Log LEVEL, Format etc
    • Python Logging in a file
    • Python Logging Variable Data
    • Python Logging Classes and Functions
    • Python MySQL Introduction
    • Create Database - Python MySQL
    • Create Table - Python MySQL
    • Insert Data in Table
    • Select Data from Table
    • Update data in Table
    • Delete data from Table
    • Drop Table from Database
    • WHERE clause - Python MySQL
    • Order By clause - Python MySQL
    • Limit clause - Python MySQL
    • Table Joins - Python MySQL
  • MongoDB
    • MongoDB Introduction
    • Overview of MongoDB
    • MongoDB vs SQL Databases
    • Advantages of MongoDB
    • When to go for MongoDB
    • Data Modelling in MongoDB
    • Is MongoDB really Schemaless?
    • Installing MongoDB on Windows and Linux
    • Datatypes in MongoDB
    • Create and Drop Database in MongoDB
    • MongoDB: Creating a Collection
    • CRUD Operations in MongoDB
    • Data Relationships in MongoDB
    • Indexing in MongoDB
    • Sorting in MongoDB
    • Aggregation in MongoDB
    • Data Backup and Restoration in MongoDB
    • Sharding in MongoDB
    • Java Integration with MongoDB
  • Elixir
    • Elixir Overview
    • Elixir Environment
    • Elixir Basic Syntax
    • Elixir Data Types
    • Elixir Variables
    • Elixir Operators
    • Elixir Pattern Matching
    • Elixir Decision Making
    • Elixir Strings
    • Elixir Char Lists
    • Elixir Lists and Tuples
    • Elixir Keyword Lists
    • Elixir Maps
    • Elixir Modules
    • Elixir Aliases
    • Elixir Functions
    • Elixir Recursion
    • Elixir Loops
    • Elixir Enumerables
    • Elixir Streams
    • Elixir Structs
    • Elixir Protocols
    • Elixir File I/O
    • Elixir Processes
    • Elixir Sigils
    • Elixir Comprehensions
    • Elixir Typespecs
    • Elixir Behaviours
    • Elixir Errors Handling
    • Elixir Macros
    • Elixir Libraries
  • TypeScript
    • TypeScript Overview
    • Install TypeScript
    • First TypeScript Program
    • Type Annotation
    • TypeScript Variable
    • TypeScript Data Type Number
    • TypeScript Data Type String
    • TypeScript Data Type Boolean
    • TypeScript Arrays
    • TypeScript Tuples
    • TypeScript Enum
    • TypeScript Union
    • TypeScript Any Data Type
    • TypeScript Void Data Type
    • TypeScript Never Data Type
  • Home
  • Introduction of CSS
  • CSS Syntax
  • CSS Selectors
  • How To Add CSS
  • CSS Comments
  • CSS Colors
  • CSS Backgrounds
  • CSS Borders
  • CSS Margins
  • CSS Text
  • CSS Lists
  • CSS Tables
  • CSS Box Model
  • CSS Dimension
  • CSS Padding
  • CSS Border
  • CSS Margin
  • CSS Outline
  • CSS Cursors
  • CSS Overflow
  • CSS Units
  • CSS Visual Formatting
  • CSS Display
  • CSS Visibility
  • CSS Position
  • CSS Layers
  • CSS Float
  • CSS Alignment
  • CSS Pseudo-classes
  • CSS Pseudo-elements
  • CSS Media Types
  • CSS Sprites
  • CSS Opacity
  • CSS Attribute Selectors
  • CSS Validation
  • CSS3 Border
  • CSS3 Gradients
  • CSS3 Text Overflow
Home >> css >> CSS Syntax

CSS Syntax

A CSS Syntax comprises a set of rules. These rules consist of a selector, property, and value. The CSS selector points to the HTML element where the CSS style rule is to be applied. Semicolons separate the CSS property. It is a combination of selector names followed by the property: value pair defined for the specific selector.

Syntax:

selector { Property: value; }


For example, if you have declared a heading tag(h1) together with having assigned some property: value pair to be used for styling the heading tag. In this case, the selector is h1, and the declaration block is a { color: green; font-family: sans-serif; } & a declaration box can contain one or more declarations separated by semicolons,. Here color: green; is a property: value pair applied to the HTML element to style them.

<!DOCTYPE html>
<html dir = "rtl">

   <head>
      <title>Display Directions</title>
   </head>
	
   <body>
      This is how IE 5 renders right-to-left directed text.
   </body>
	
</html>

Each declaration has a CSS property name and a value that is separated by a colon & is surrounded by curly braces. The multiple CSS properties can be declared by separating them with the semicolon.

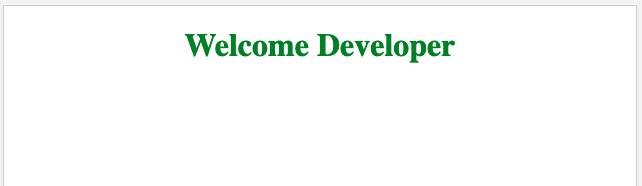
Example: Following example shows the use of CSS Syntax for styling the HTML elements.

<!DOCTYPE html>
<html>
<head>
	<!-- Style of h1 selector -->
	<style>
	h1 {
		color: green;
		text-align: center;
	}
	</style>
</head>

<body>
	<h1>Welcome Developer</h1>
</body>
</html>

Try with example

Output :


You can use CSS Selectors for selecting HTML elements on the basis of their element id, name, attributes, etc. CSS Selectors can select one or more elements simultaneously.

You can divide CSS Selector into five categories:

  • Simple Selector: For selecting the HTML elements on the basis of their element id, name, attributes, etc.
  • Combinators Selector: To explain the relationship between two selectors.' 
  • Pseudo-classes Selector: For defining an element's special state. 
  • Pseudo Elements Selector: A keyword added to a selector lets you style the selected element's specific part.
  • Attribute Selector: Used for selecting an element with some particular attribute or attribute value.


Let's study Simple Selector & also understand its implementation through the examples.

You can categorize the Simple Selector in three ways:

CSS element selector: The CSS element selector is used to select HTML elements that need to be styled. The selector declaration has the HTML element's name element, and the CSS properties that need to be applied to the HTML element are written within the brackets {}.

Syntax:

element_name { 

// CSS Property

 }


Example: This example shows the element selector's use for selecting the HTML elements by their element name & style them.

<!DOCTYPE html>
<html>
<head>
	
	<!-- Syntax of h1 selector -->
	<style>
	h1 {
		color: green;
		text-align: center;
	}
	</style>
</head>

<body>
	<h1>Welcome to CSS tutorial</h1>
</body>
</html>

Try with example


CSS id selector: You can use the #id selector to set the given id's style. In an HTML document, the id attribute is the unique identifier. You use the id selector with a # character.

Syntax:

#id_name { 

// CSS Property 

}


Example : This example shows the id selector's use for selecting the HTML elements by their id & style them.

<!DOCTYPE html>
<html>
<head>
	
	<!-- Style of id selector -->
	<style>
	#heading {
		color: green;
		text-align: center;
		font-size: 40px;
		font-weight: bold;
	}
	</style>
</head>

<body>
	<div id="heading"> I will be logical  developer</div>
</body>
</html>

Try with example


CSS class selector: You can use the .class selector to select all elements belonging to a particular class attribute. For selecting the elements with a particular class, use the (.) character and specify the class name. The class name is used primarily to set the CSS property to the given class.

Syntax :

.class_name { 

// CSS Property 

}


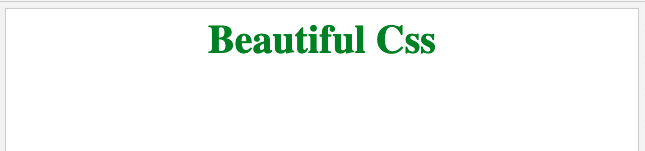
Example: The example shows class selectors' use for selecting the HTML elements by their class & style them.

<!DOCTYPE html>
<html>
<head>

	<!-- Style of class selector -->
	<style>
	.heading {
		color: green;
		text-align: center;
		font-size: 40px;
		font-weight: bold;
	}
	</style>
</head>

<body>
	<div class="heading"> Beautiful Css </div>
</body>
</html>

Try with example

Output :


You can use the universal selector denoted by a star (*) symbol for applying the common CSS style properties to all the HTML Elements.


CSS * Selector: You can use the * selector in CSS for selecting all the elements in an HTML document. You can also use it to select all elements which are inside under another element. It is also known as the universal selector.

Syntax:

* { 

// CSS property 

}


Example: The example shows universal selectors use to select all the HTML elements containing the common CSS properties & style them.

<!DOCTYPE html>
<html>
<head>
	<title>* Selector</title>

	<style>
	* {
		color: green;
		text-align: center;
	}
	</style>
</head>

<body>
	<h1>CSS Tutorial</h1>
	<h2>*(Universal) Selector</h2>
	<div>
		
<p>Tutorial With Example</p>

		
<p>Welcome</p>

	</div>
	
<p>It is a web tutorial portal.</p>

</body>
</html>

Try With Example


Supported Browser: 

  • Google Chrome 94.0
  • Microsoft Edge 94.0
  • IE 11.0 
  • Firefox 93.0
  • Opera 80.0
  • Safari 15.0


CSS | #id Selector

You can use the #id selector to set the given id's style. In an HTML Document, the id attribute is the unique identifier. You can use the id selector with a # character.

Syntax :

#id { 

// CSS property 

}


Example :

<!DOCTYPE html>
<html>
	<head>
		<title>#id selector</title>
		
		<style>
			#sec1 {
				color:green;
				text-align:center;
			}
			#sec2 {
                                color:red;
				text-align:center;
			}
		</style>
	</head>
	
	<body>
		
		<!-- id attribute declare here -->
		<h1 id = "sec1">Welcome to css Tutorial</h1>
		<h2 id = "sec2">#id selector</h2>
	</body>
</html>

Try With Example


Supported Browsers: The browser an id selector supports are listed below: 

  • Google Chrome
  • Internet Explorer
  • Firefox Safari
  • Opera


CSS | * Selector

You can use the * selector in CSS for selecting all the elements in an HTML document. You can also use it to select all elements which are inside under another element. It is also known as a universal selector.

Syntax :

* { 

// CSS property 

}


Example :

<!DOCTYPE html>
<html>
	<head>
		<title>* selector</title>
		
		<!-- CSS property for * selector -->
		<style>
			* {
				background: green;
				font-weight:bold;
				margin-left:70px;
				color:white;
			}
		</style>
	</head>
	
	<body>
		<h1>Welcome to CSS tutorial</h1>
		<h2>*(Universal) Selector</h2>
		
		<ul>
			<li>Data Structure</li>
			<li>Computer Network</li>
			<li>Operating System</li>
		</ul>
		
		<ol>
			<li>Java</li>
			<li>Ruby</li>
			<li>Pascal</li>
		</ol>
		
	</body>
</html>								

Try With Example


Supported Browsers: The browser supported by *(universal) selector are listed below: 

  • Apple Safari 3.1 
  • Google Chrome 4.0 
  • Firefox 3.0 
  • Opera 9.6 
  • Internet Explorer 7.0


CSS Class Selector

You can use the .class selector for selecting all elements belonging to a particular class attribute. For selecting the elements with a particular class, you can use the period (.) character specifying the class name. It will match the HTML element on the basis of the contents of their class attribute. The class name is mainly used for setting the CSS property to a given class.

Syntax :

.class { 

// CSS property

 }


Example 1: The example shows the class Selector for the specific HTML element.

<!DOCTYPE html>
<html>
<head>
	<style>
	.style {
		color: green;
	}
	
	.info {
		background-color: yellow;
		font-style: italic;
		color: green;
	}
	</style>
</head>

<body style="text-align:center">
	<h1 class="style">
			Tutorial With Example
	</h1>
	<h2>.class Selector</h2>
	<div class="info">
		<p>Tutorial With Example: A web tutorial  portal</p>
	</div>
</body>
</html>

Try With Example


Example 2: The example demonstrates the space-separated class name.

<!DOCTYPE html>
<html>
<head>
	<title>class selector</title>
	<style>
		.style {
		color: green;
	}
	
	.info {
		background-color: yellow;
        }
	</style>
</head>

<body style="text-align:center">
	<h1 class="style">
			Tutorial With Example
	</h1>
	<h2 class="info">.class Selector</h2>
	<p class="website info">
	      Tutorial With Example: A web portal
	</p>

</body>
</html>

Try With Example


Supported Browsers:

The browser supported by the .class selector are listed below: 

  • Google Chrome 
  • 1.0 Firefox 1.0 
  • Microsoft Edge 12.0 
  • Opera 3.5
  •  Internet Explorer 3.0 
  • Safari 1.0


  • Prev
  • Next


-Advertisement-


DeveloperTutorial
[email protected] © 2022-2023 Developers Tutorial All rights reserved.

Follow Us

Facebook Twitter LinkedIn Printerest Reddit

Announcement

Its a big achivement for us, We make a partnership with TutorialWithExample.com for the better content of our users.

Still Need Help ?

Let us now about your issue and a Professional will reach you out.